Creating A Multi-Day Program from Favorites
In this article, we will go over using your favorite items (workouts, meals, tasks) to create multi-day programs, seamlessly, in FitSW.
About Multi-Day Programs
Multi-day programs are pre-built fitness and nutrition programs that cover a predetermined time period (i.g. 30 days, 60 days, 90 days, etc…).
Typically they contain all of the workouts, meals/nutrition counseling, and tasks the client will be assigned over the course of the program. Everything is pre-built.
This doesn’t mean there won’t be adjustments made to the program. It’s simply a method of planning every aspect of the program and tying together the nutrition, fitness, and lifestyle changes into one object.
Vocab
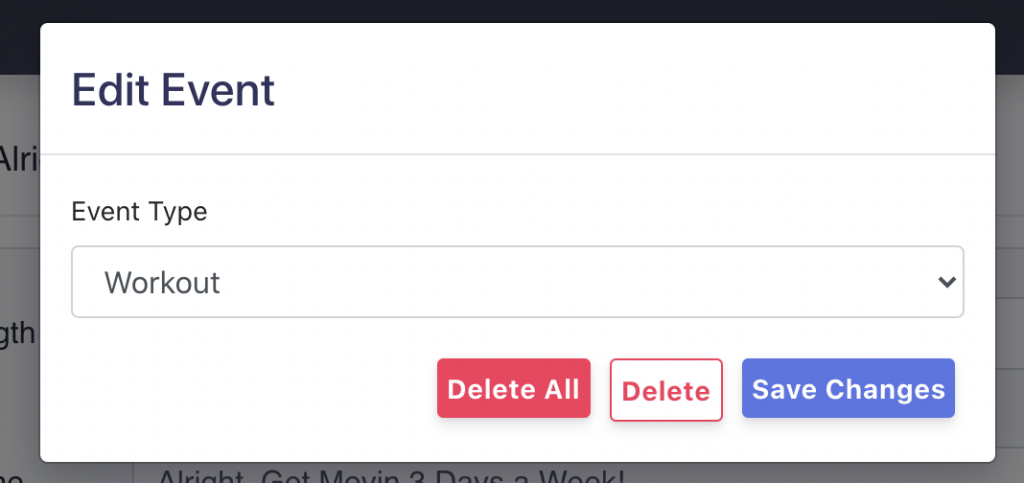
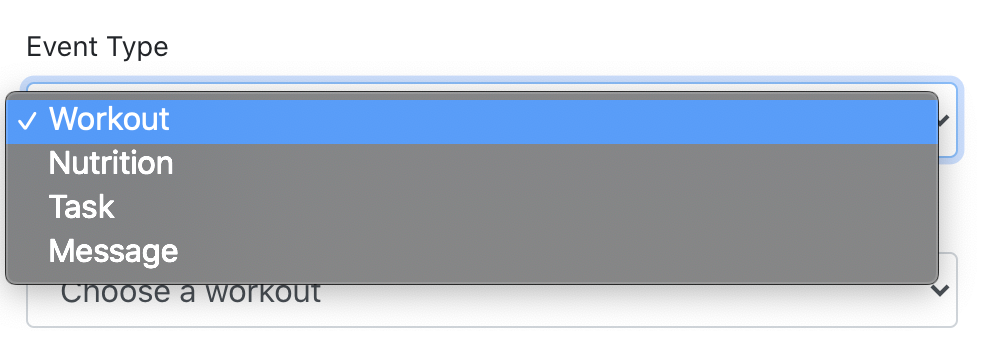
Event type – this term is used to generically define what type of event you are working with and only has three types:
- Workouts
- Nutrition
- Tasks
Event – this term is used to reference a specific event. Such as a specific workout or nutrition plan.
What You’ll Need to Start
Programs are built from workouts, nutrition plans, and tasks that are in your favorites list. As such, make sure you have all of your workouts, nutrition plans, and tasks that you want in the program, built out and saved to your favorites list.
Let’s Build a Program 💪
Step 1. Log in to fitsw.com.
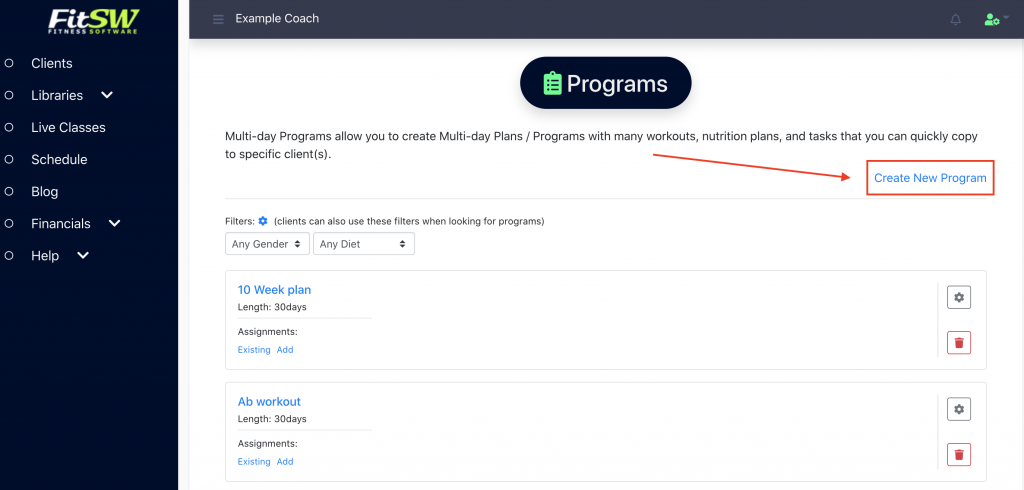
Step 2. Once logged in, click on “Libraries” in the navigation menu. From the Drop down menu, click on “Programs”.

Step 3. The next page is the programs list and is where all of your programs will live. Once you create them. To start creating a program, click “Create New Program”.
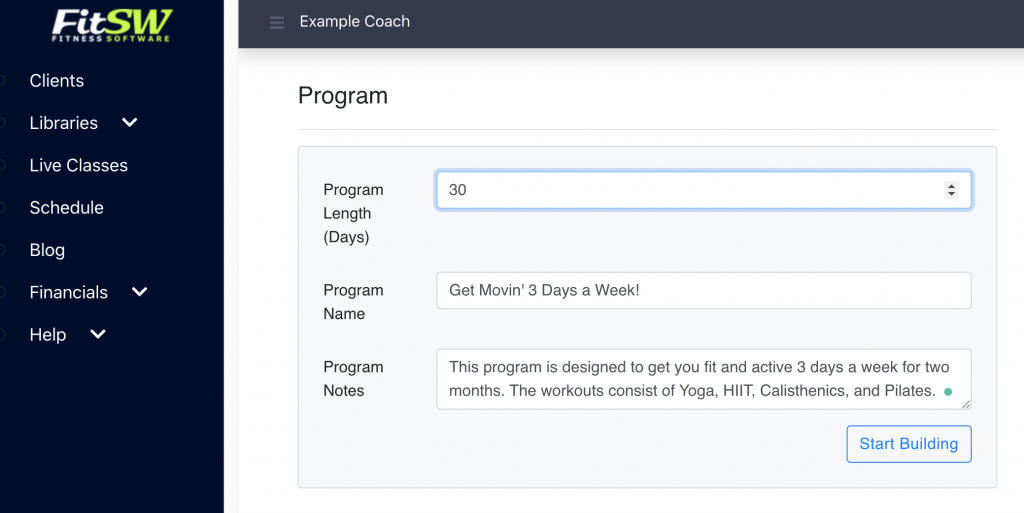
Step 4. Give the program a length in days. This must a positive whole number (must not contain a negative number or decimal).
Once you’ve given it a duration and name, provide any notes that might be of value to clients who you might be assigning this program too.
After populating all of the general information click “Start Building”.
Step 5. Once you click “Start Building”, we will actually stay in the same page. Notice a calendar will render below the general information you just filled out.
The calendar is actually what we will use to build the entire program.
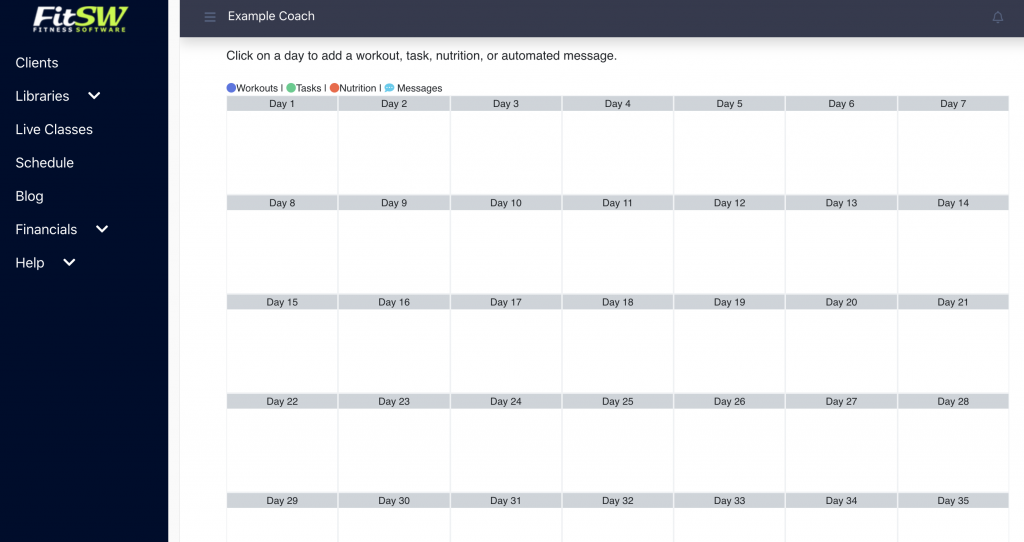
Step 6. Scroll down and click on “Day 1” to get started adding your first event to the program.
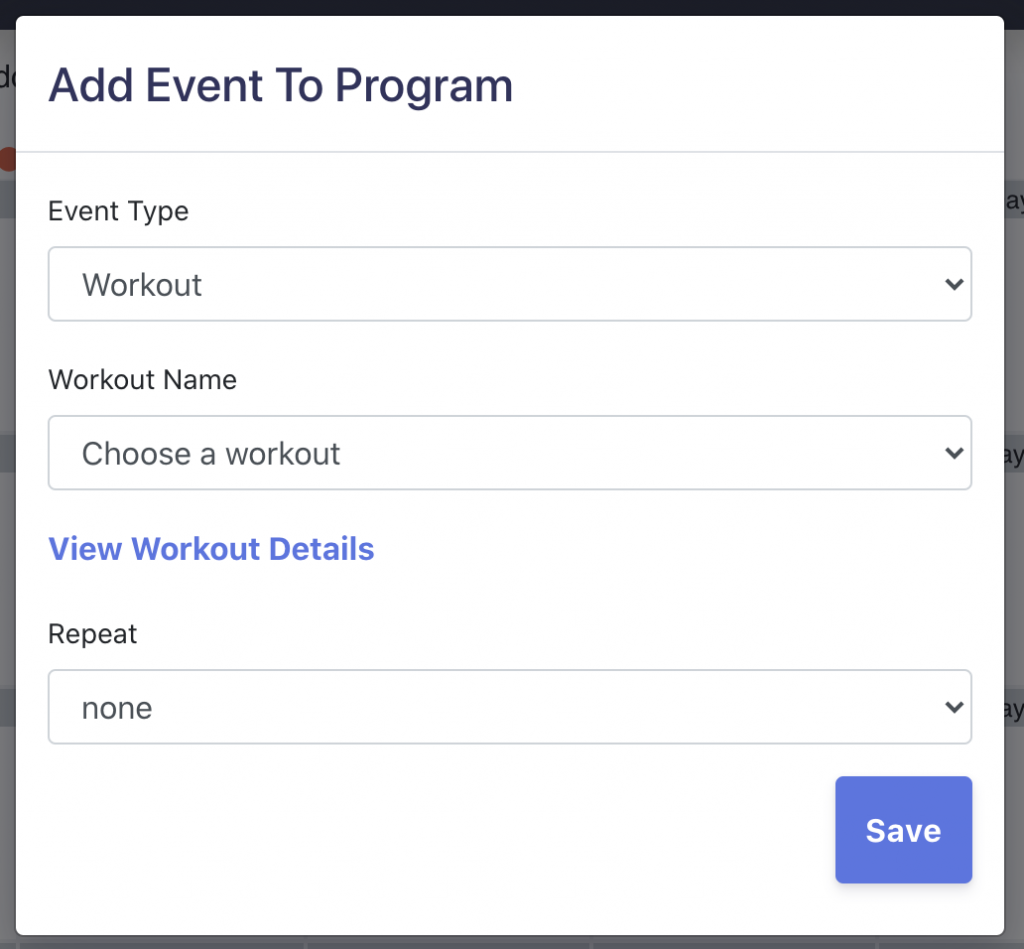
Step 7. Once you click on a day, a pop menu will open. In the pop up menu, you can choose what you want event to assign first by choosing either “Workout, Task, or Nutrition” in the drop down under “Event Type”.
For this example, I will choose a workout. This will only pull from events in your Favorites Libraries!
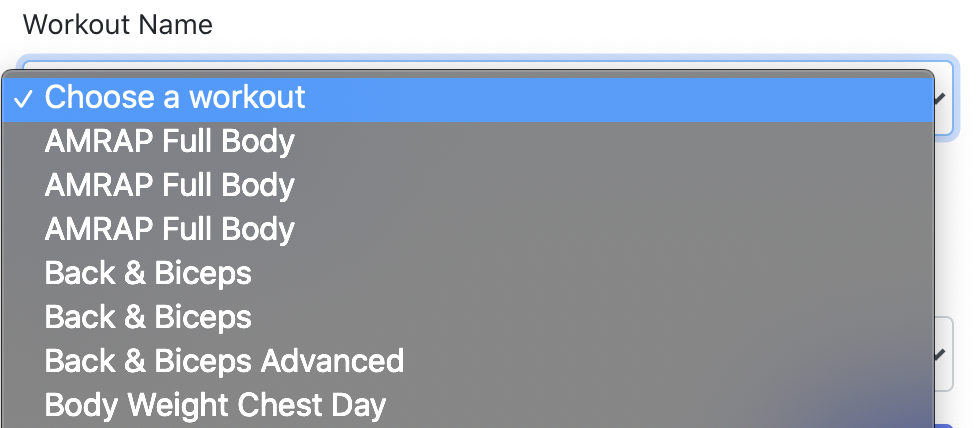
Step 8. Once you have chosen the event type that you want to add to the program, all of your favorites for that specific event will load in the next dropdown. There, you can pick the workout, task, or nutrition to add.
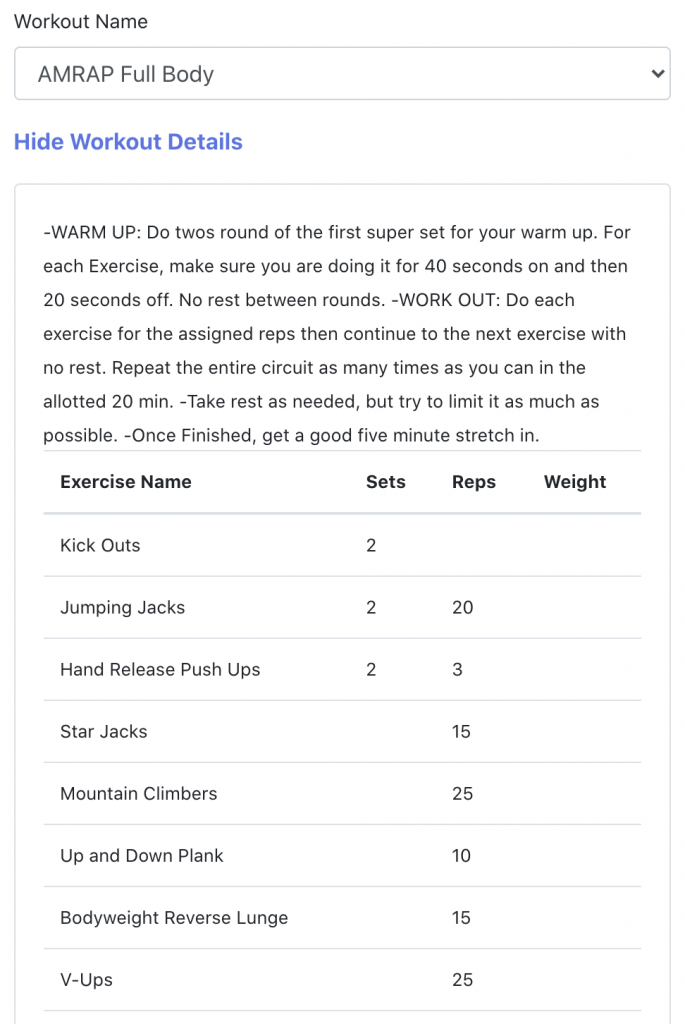
Step 9. Once you have the event selected, you can verify you have the right event by clicking “View Workout Details”. This will open the event details.
Once you have verified you have the right event selected, you hide the details by selecting “Hide *insert event name*“.
Step 10. Now that you have verified this is the correct workout, nutrition, or task, you can then set whether or not the event repeats and if so, how often it repeats.
To do so, click on the drop down next to “Repeat”. There you can choose either “daily”, “weekly”, or “none”.
In this example, I will select “weekly”.
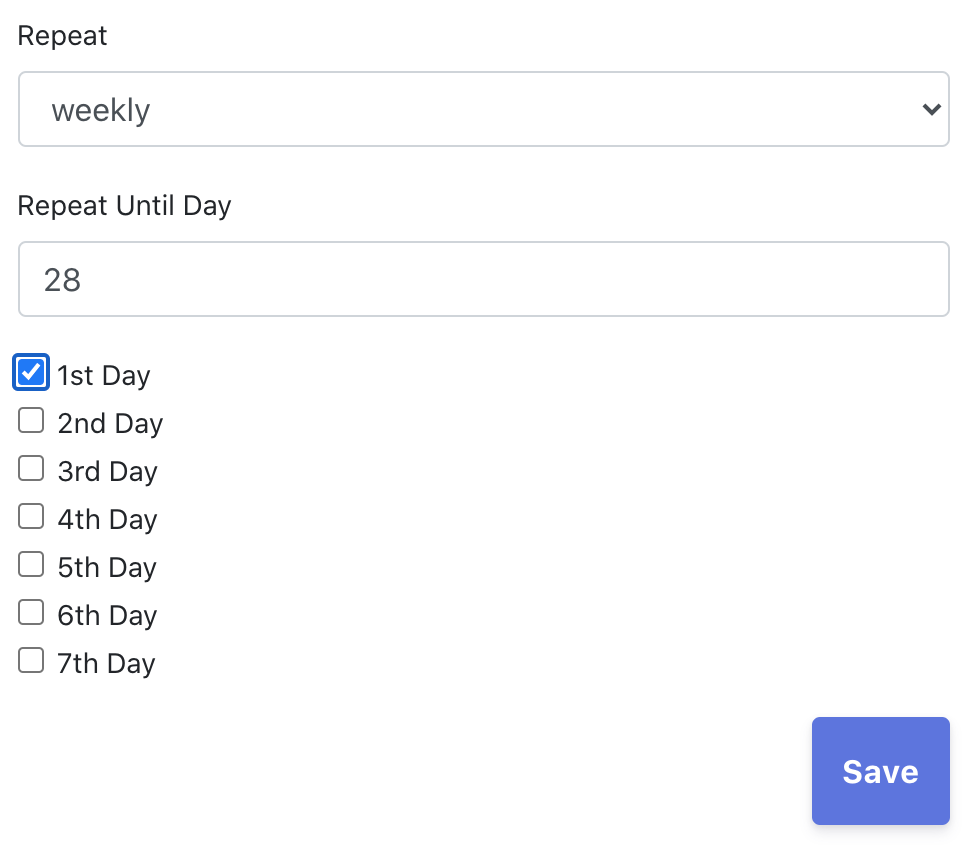
Step 11. Once you have selected your “Repeat” frequency, input what day in the program the event will repeat until. For example, typing in “14” will mean the event will repeat until the end of the second week of the program.
For this example, I will input “28”. So my event will repeat until the end of the 4th week.
The last part of setting the “Repeat” settings is choosing what day or days of the week the event will repeat on. For this example, I will just choose the 1st day of every week.
You can choose multiple days of the week to have the event repeat on.
Once you are finished setting the repeat settings, select “Save” in the bottom right. Then, you will see your event load in your program as you have scheduled it.
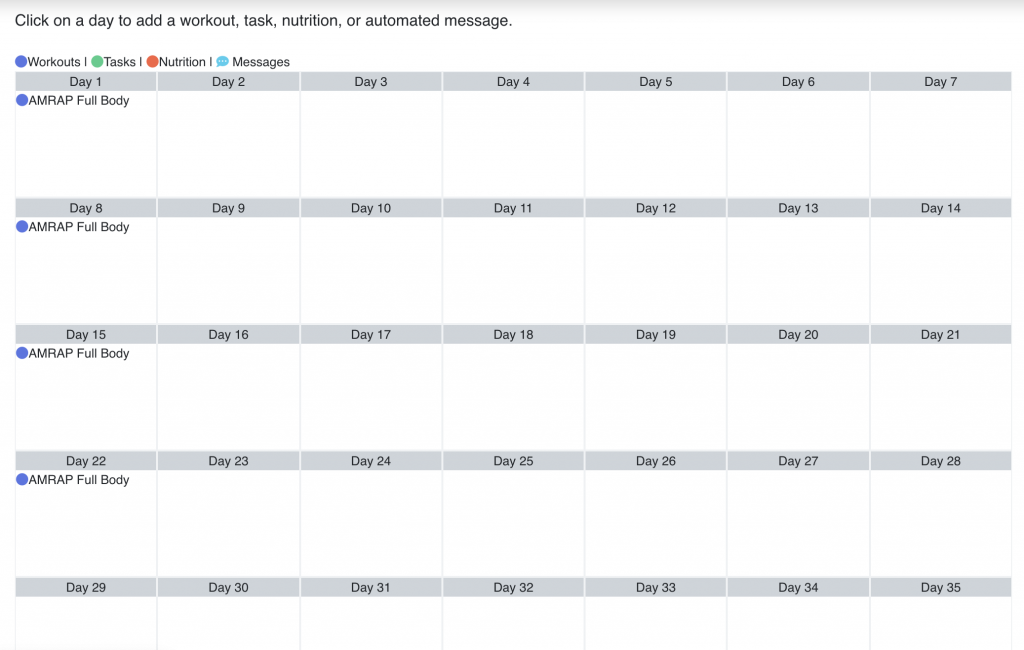
Above, you can see the results of what I just scheduled.
Continue repeating this process until you have the program built out completely. Some people will go through and add all of the workouts to the program and then move on to adding the nutrition events and then the tasks.
However, your workflow is totally up to you.

Step 12. Once you have added everything you need to the program, it’s time to assign the program to a client.

To do so, simply scroll up to the top of the page and select “Assign to client”. In the pop up menu, select the clients you want to assign the program to. Then select the start date.
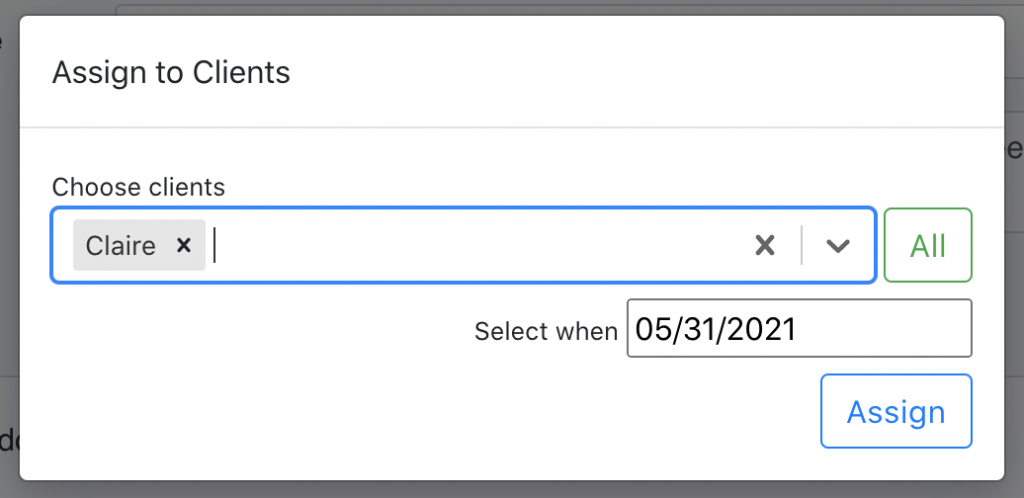
Once finished, click “Assign”.
Saving Programs
If you don’t want to assign the program yet, simply leave the page. All data is saved automatically. The program can be found in you programs list, saved as a draft.
Quick Tips: Programming the Rest of the Program
Quick tip 1. If you want to add another event to a day that has events already, simply click outside of the event in the specific day that you want.
You can add additional workouts, nutrition plans, or tasks.
Quick tip 2. Need to delete an event? Or a bunch of events of the same type? Simply just click on the event and select “delete” or “delete all” from the pop up menu. Aside from deleting, you can also edit the specific event that you clicked on by clicking “View Selected *insert event type*” and then click “Go to *Insert Event Type* Editor”.